Rename your master branch in Azure Repos


Renaming your master branch in Azure Repos could be as simple as a few clicks. But if you have complex policies or permissions in place, it may be a little more work.
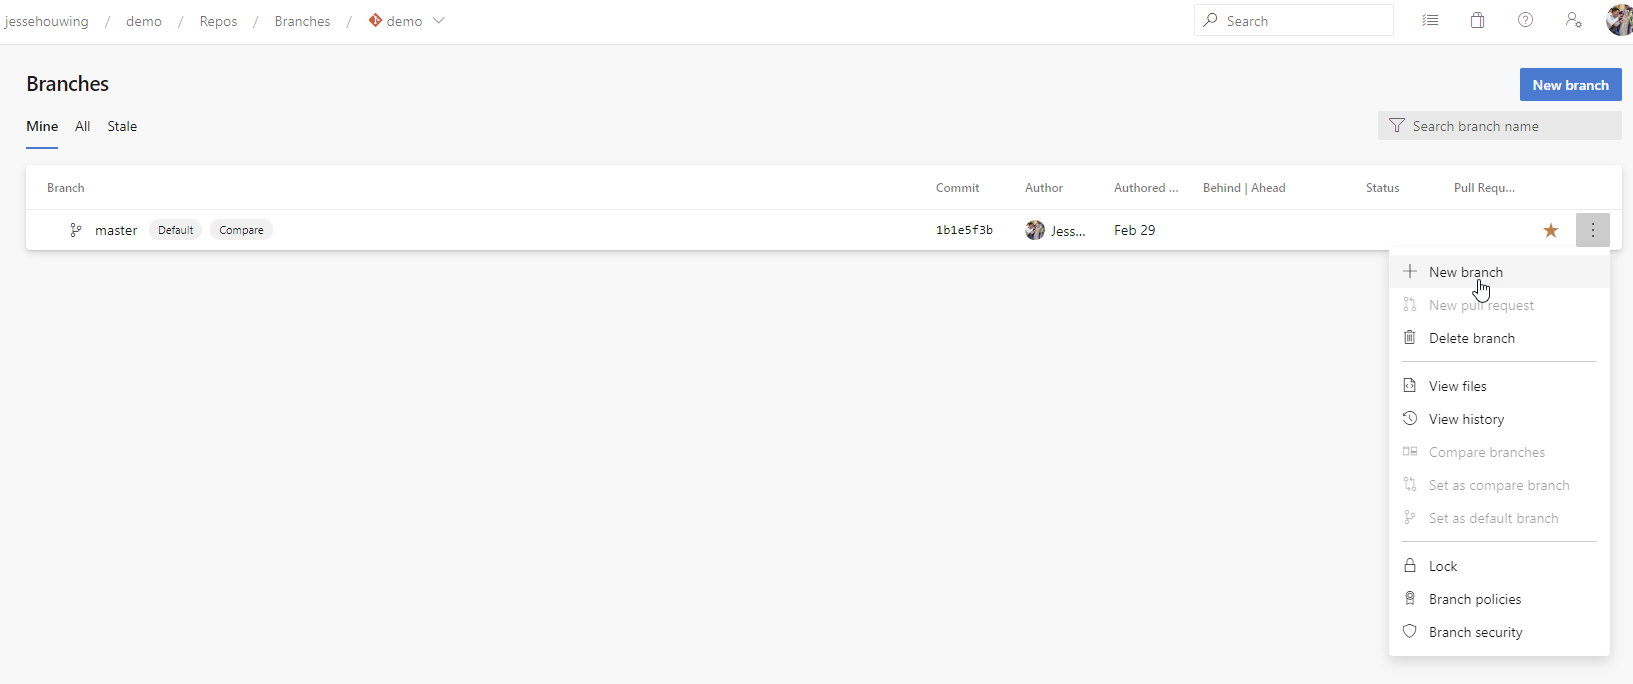
To rename your master branch you have to create a new branch and then delete the old one:
- Use the context menu to create a new
+ new branchfrommaster.
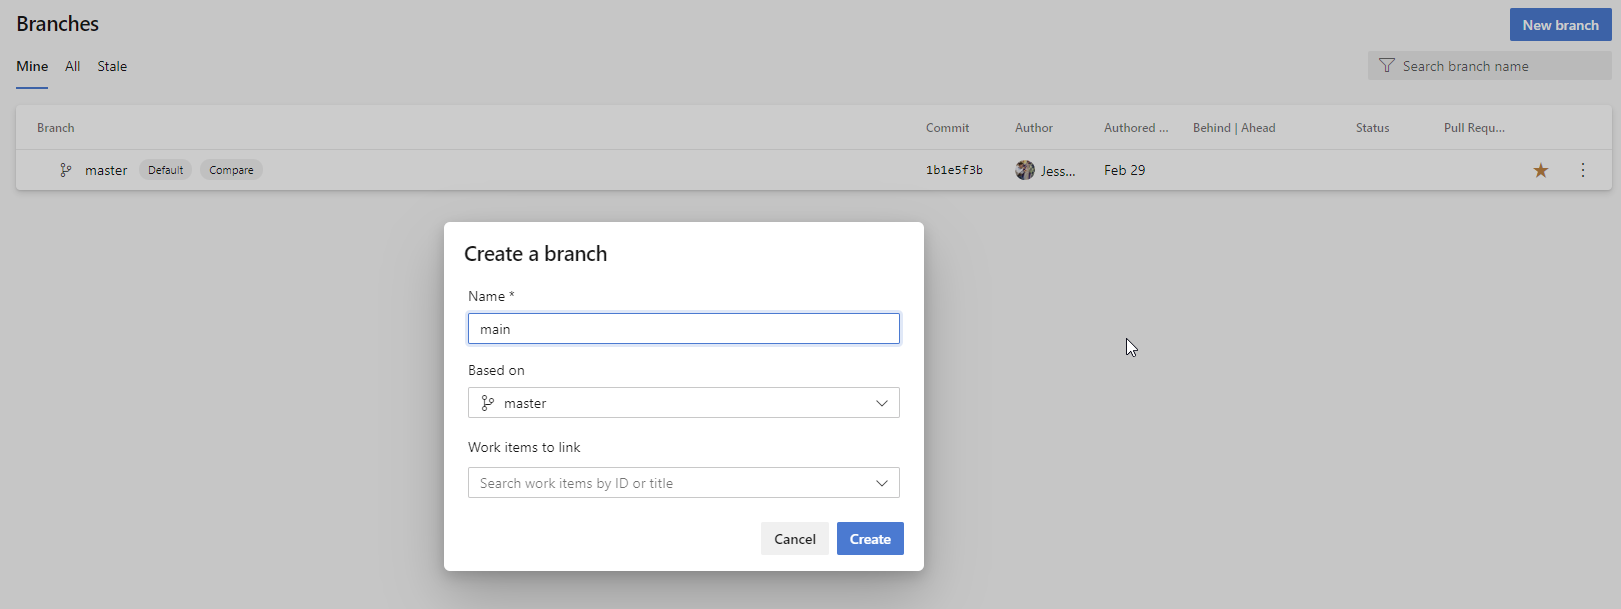
2. Chose a better name for your branch. main will do:
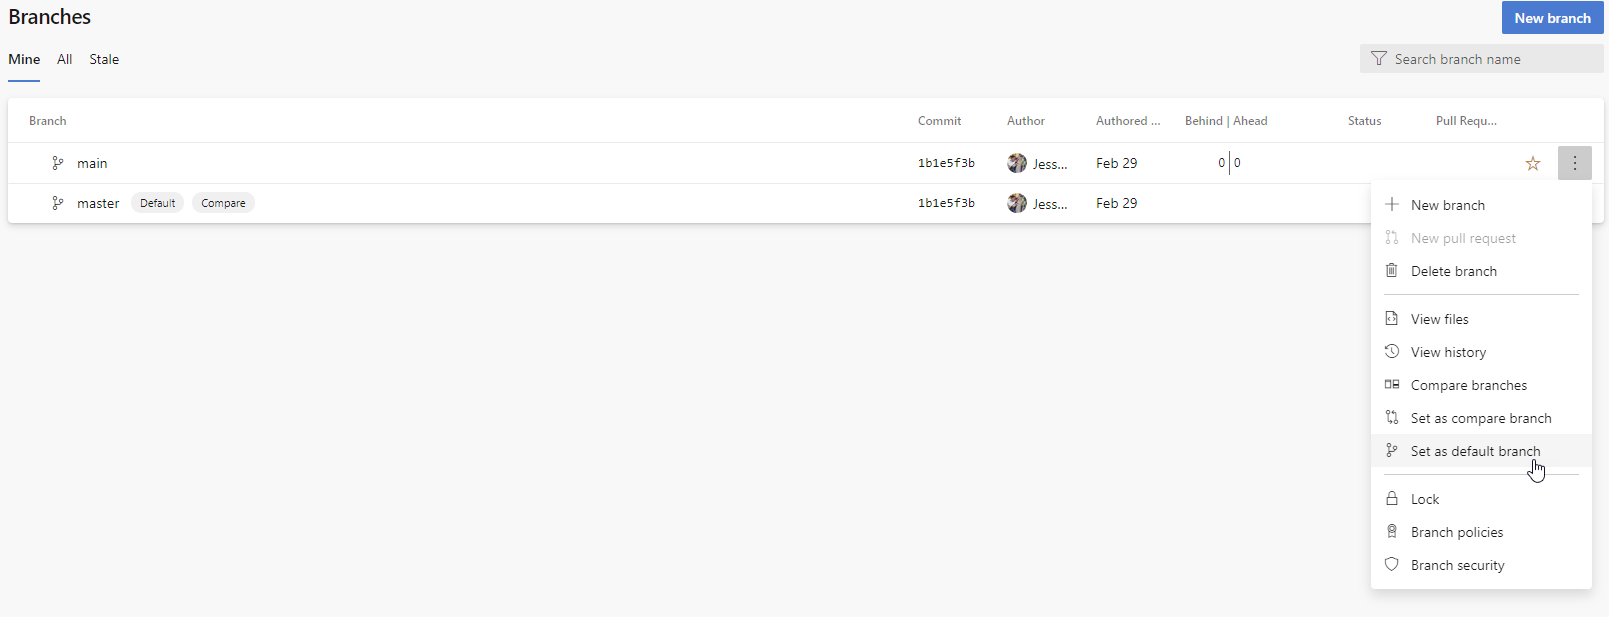
3. Set the new main branch as your new default branch:
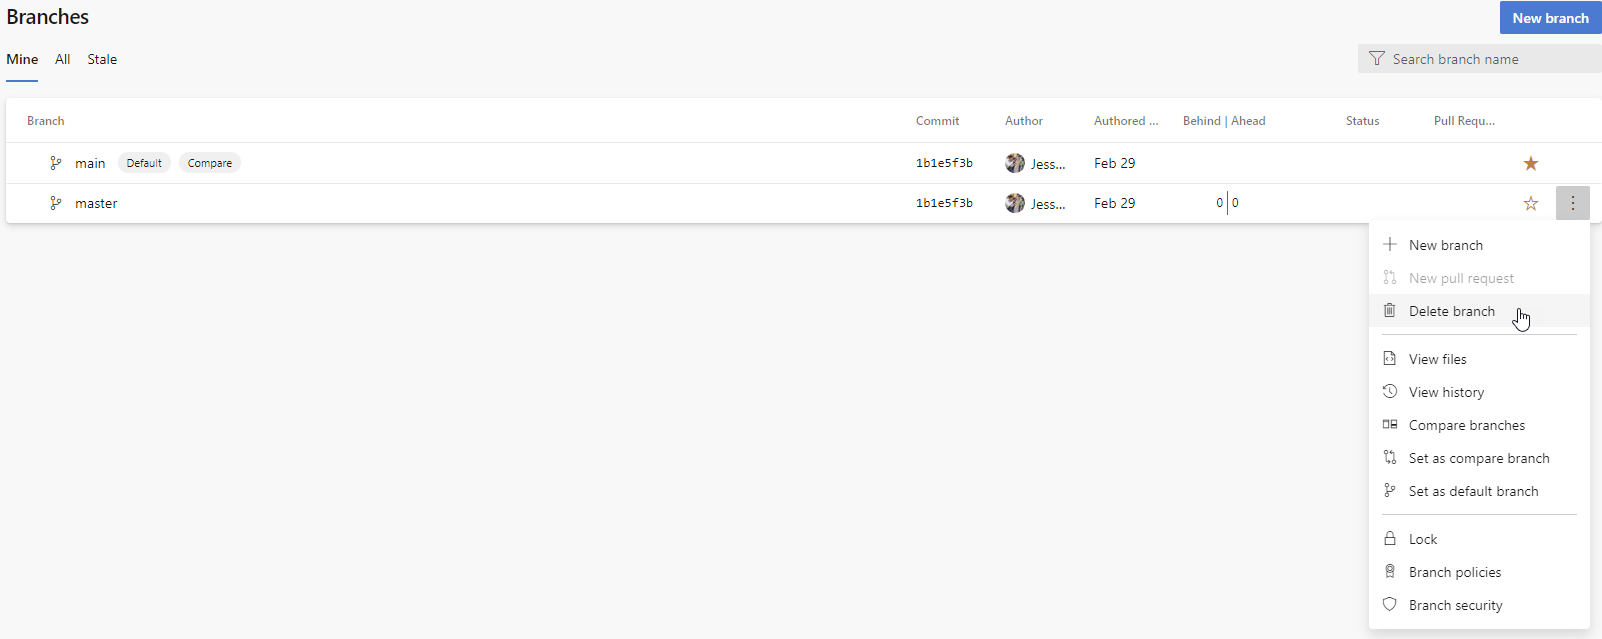
4. And finally, delete your old master branch.
If you're also using Azure Pipelines (which you should if you're also using Azure Repos), you may need to fix a few other things as well, they're essentially the same as the ones you'll need to fix when using Azure Pipelines together with GitHub.